Disclaimer for tutorials: I use Photoshop CS 8 for Mac so I can't speak to how things may work in a different program. However, I've posted this tutorial in the forum & if you have any tips for different programs, please post them in the thread!
Today we're going to go over how to use templates & our example will be the very cool template provided by Meagan (AKA Meagan's Creations) for the September Template Challenge. In addition, I'm using the soon-to-be released kit Dive Into Fall by Mommy Me Time Scrapper & The Scrappy Kat; you'll be able to pick this kit up next Monday! Click on any of the pictures to view a larger version.
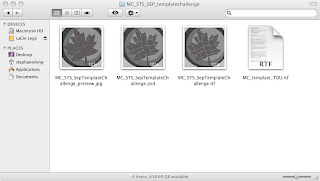
To start, you'll first need to download & open the template in your program. Templates can be found in several different formats: PSD, TIF, JPEG, or PNG. If your program supports PSD or TIF, pick one of those; JPEGs & PNGs are sometimes provided for programs that don't support the standard formats. Personally, I prefer TIFs as they are smaller than PSDs but it really doesn't matter which one you use.
 Sometimes you may open a template & get a notification that text layers are missing fonts & will need to be updated. Go ahead & click OK as the warning just means the designer used a font that you don't have installed; it won't effect the template. The first step I would recommend would be to rename & save the template as a new file so you can reuse the template in the future.
Now that you've got your template open, take a look at the layers palette; if you think of your template as a stack of papers, the one at the very bottom of the layer palette is your background layer & then the layers work on up to the top of the stack. Select the bottom layer & then open up the paper you want to use as the background.
Select the paper, hold down your shift key & drag the paper over to the template (holding the shift key will keep the paper centered). Because this is the background paper, you don't need to clip the paper to the layer but if you want, use Ctrl + G to clip the paper to the background. Then you can use Ctrl + E to merge the two layers together *optional but I like to do it so there aren't tons of layers showing*. Continue to use Ctrl + G and Ctrl + E to clip your papers to the desired layers. Remember that your paper needs to be above the layer you want to clip it to; can't tell you how many times I put the paper below the layer & then wonder why it's not clipping correctly.
If you find there's a layer you don't want to use at all, you can either click on the little eye in the layer palette to hide it or you can delete it all together by right clicking on the layer & selecting Delete Layer. The same for element placeholders, you can either clip papers to the placeholders or hide and/or delete them to put elements from the kit in their place. Just open up the element you want to use, then drag & drop it onto your template. You can then resize the element or rotate it to suit your needs.
Keep in mind that if you drop your element under a layer, you may not see it as it could be hidden by a layer above it. In that case, go to the layer palette & drag your element layer up until you've gotten it where you want it to be. It can also be helpful to rename your element layer so you don't forget which layer is which element.
For a template like this one, you have several options for pictures. One option is to clip a picture or paper to each of the layers of the leaves using Ctrl + G and Ctrl + E. Using this option will allow you to showcase a bunch of different pictures or papers.
Another option is to merge layers together & then clip a photo to them creating a very neat effect. To do this, you need to link the layers you want to merge; first select a layer then click on the empty box next to the layers you want to merge it with. A Link Icon will appear in the box indicating that the layers are now linked. After you've linked all the ones you want, use Ctrl + E & the layers will merge together. Then just use Ctrl + G and Ctrl + E to clip your photo to the merged layer.
See? Totally neat effect & great if you have a big picture.
Now you can add more elements, a title, journaling, drop shadows, & anything else you'd like to your layout. As always, try to remember to save your work every few steps or so. I know we've all forgotten to save & then lost our work when the program crashed or the power went out or had to deal with an attack from mutant birds. Save, save, save!
If you loved this template, head on over to the September Template Challenge to pick it up & earn some points. For this challenge you will receive 5 points as well as an extra 5 points if you use 90% or more of any current STS products (use of just the template does not count as a STS product); plus you get the template! Here's a few that have already been submitted this month. On the left is Filandstef's layout, 1st Canada Day using Oh Canada by Rainamoon Scraps; on the right is Meleahg's submission called Fall Colors, she used the kit We Give Thanks by Scrappin' Serenity.


No comments:
Post a Comment