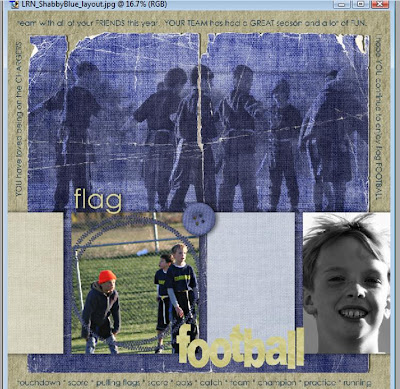
This was one of the things that fascinated me about digital scrapbooking. There just isn't any way to do this technique with real paper scrapping, so I thought it was fun and wanted to do it all the time. There are probably other ways to do this, but this is how I do it. I have Photoshop 7, so if you have a different version, the steps may be a little different but should be similar. Here are a couple of examples of photo overlays I have done.
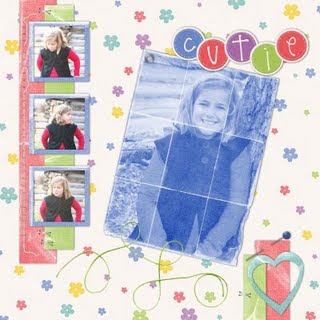
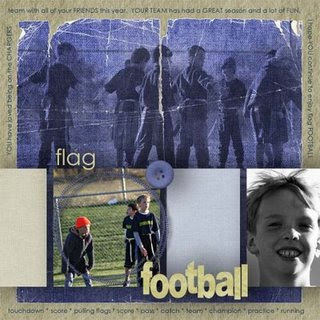
This is how I do a photo overlay in Photoshop. For this tutorial, I will show you how I did it on my examples with black and white photos, but you can also change your photos to sepia or leave in color. Experiment with the different looks. This is great for photos that may be a bit blurry or out of focus because you won’t know they were after you get done.
1 – open up your photo
2 – open up your paper
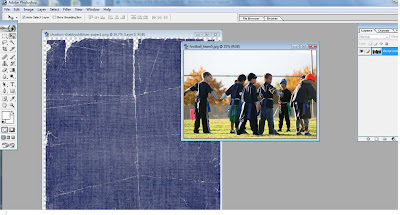
3 – Desaturate your photo or make it black in white (or you can change to sepia or leave color)
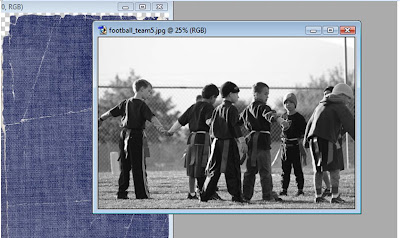
4 – Drag your photo over your paper or over your mat and use the Free Transform option to “stretch” it to fit the area you are covering. If you don’t stretch all the way to the edges, you may end up with a line.
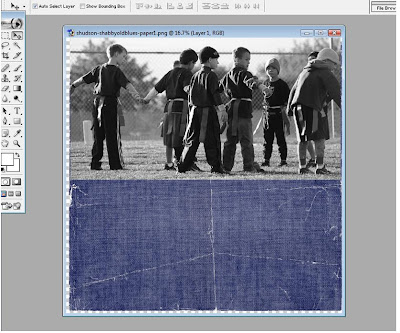
5 – For this example, I wanted it to show the tears in the paper as tears in the photograph, so I did a CTRL G to clip my photo to the paper . If you are putting it on a mat as in my first sample above, you will also want to clip it down to take the shape of the mat first.
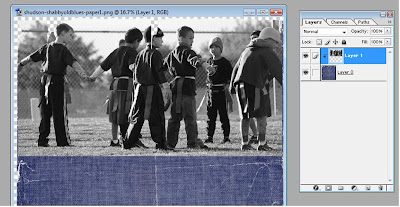
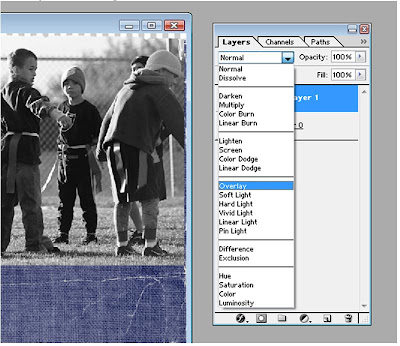
6 – In the Layers Palette with the photo layer selected, go up to the top where it says Normal and pick “Overlay” from the drop down
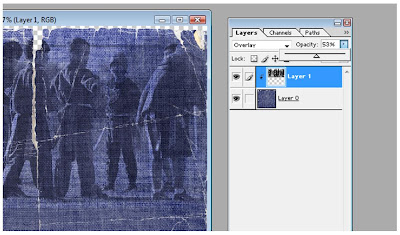
7 – You can play with the “Opacity” in that same layer palette to make it lighter if you want
8 – Now you can do the Ctrl E to merge down
9 – Finish your layout
This is a really easy technique and it is fun for filling up white space. Have fun and leave any questions here as a comment and I will try to answer.

 This is how I do a photo overlay in Photoshop. For this tutorial, I will show you how I did it on my examples with black and white photos, but you can also change your photos to sepia or leave in color. Experiment with the different looks. This is great for photos that may be a bit blurry or out of focus because you won’t know they were after you get done.
 3 – Desaturate your photo or make it black in white (or you can change to sepia or leave color)
 4 – Drag your photo over your paper or over your mat and use the Free Transform option to “stretch” it to fit the area you are covering. If you don’t stretch all the way to the edges, you may end up with a line.


No comments:
Post a Comment