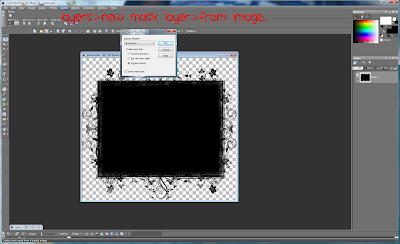
-Open your mask in PSP
-From the top tool bar choose Layers> New mask layer> from image..> tick the circle for 'source opacity'

This is what your layer palette should look like-
 -Click on Raster 1. Using your magic wand with the Match mode set to 'All Opaque' click on your mask.
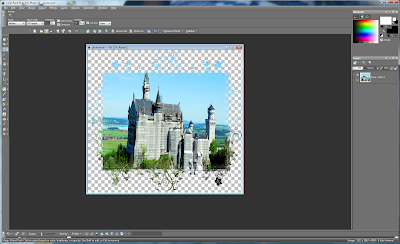
-Open the photo (or paper) that you want to use. Copy (CTRL C) the photo and paste it into your selection (CTRL+Shift+L). (CTRL D to select none)
-In your layers palette, click on the minus sign (-) next to your layer named Group-Raster 1.


3 comments:
Very helpful! Thank you. I've been using photo masks in a different way with several more steps. This is easier. :)
This seems more complicated than what I do...I simply open the clipping mask, drag my picture onto the clipping mask, making sure my photo layer is above the mask layer. With the photo layer highlighted, I right click and select "create clipping mask". Done. I can then either merge them or link them to drag around and place where I want or resize. I use CS4.
Thank you for the instructions. I think that Rose (in the post before mine) missed the entire point, which is that this is using Paint Shop Pro, not PhotoShop (which costs an arm and a leg more than PSP).
Post a Comment